Showing posts with label Updated. Show all posts

Thursday, February 21, 2013

Mini Giveaway Surprise Gift Steampunk Gentleman Heart Keychain

Congrats Kristina! I hope you like him! :)


Yarn: Caron Simply Soft Party
Hook: 4.25 mm
Findings: 7mm Paste-On eyes, 3/8" Lock Washer External Tooth SAE, Embroidery floss, Chain, 2 sizes of TK......ring

Pattern: Little Heart Plushy by Easy Makes Me Happy
Hat: made up on the spot by me, Panda8ngel :)

Update! Kristina has posted about her little surprise gift on her blog, HERE. I hope you will check out all the pretties she's made. :)

<3 <3 <3

Here is the other prize for my other blog followers. :)


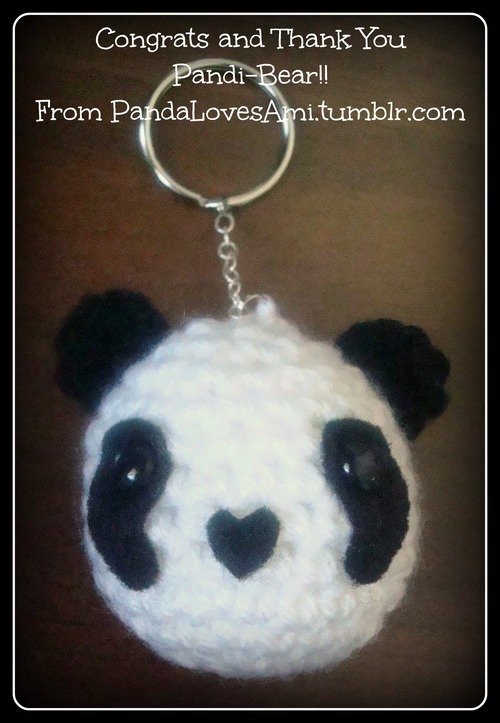
If you want to learn more about this little panda, click HERE. :)

Thank you to all the visitors, old and new followers! 

Wednesday, December 5, 2012

Bear with me....


Sorry for the lack of posting but I have been having a hard time with posting and blogger lately. 

Once I fill up my Picasa allowance for pictures for this blog, I will have to pay for storage just to post pictures. Therefore, you might see some advertisement on this blog, which I don't want to do, but have to so that I can pay the monthly fee. :(

I will be doing some back posting as soon as I clear up some space on my picasa web slbums so that I can post pictures again.

Update:
Ok...so I've been denied by Adsense because "it does not meet our program criteria". Therefore, I cannot post ads onto my blog. Wow...they won't even say why. I guess it could be because I don't get enough traffic or don't review stuff but I feel like I just got rejected after a job interview. Sigh...I will have to find another source of revenue so that I can continue blogging....Any suggestions?

Saturday, September 1, 2012

Crochet Pacifier Pouch


3 in Wide x 2.5 in High
Yarn: Caron Simply Soft
Hook: 5 mm
Pattern: Pacifier Pouch by Alli Crafts
Front Button: 0.6 in or 1.5 cm
Small Inside Button


My Changes:
Flap closure instead of just a button and loop
Row 1: sc across, ch 1
(do not turn)
Row 2: {Left Handed} sc across, ch 1
(do not turn)
(that was hard because I am right handed
and my stitches came out really tight)
Row 3: sc dec, sc across, sc dec
Row 4: sc, hdc, dc, tc, tc, dc, hdc, sc
(space btw 2 tc becomes the button hole)
Row 5: reverse sc aka crab stitch across


Panda's Tip of the Day:
When sewing on the button, to allow for the thickness of the flap,
I sewn the button on loosely and then used a simple macrame knot to make the "stem" more sturdy.

<3 <3 <3

I love how the pattern included a loop that you can put around your purse or diaper bag handle or the stroller handle to hold the pouch in a more accessible place.


And no Pacifier Pouch should be without a Pacifier. :)


Acrylic yarn was used because there is less fuzz and it is very easy to clean.

I have a few ideas how to dress these up...we shall see what I do. :p

Update:
I couldn't leave this one plain so I added a star using this pattern to the back.


Friday, August 24, 2012

Granny Stitch Preemie Baby Hat

My latest baby hat for the Solider's Angels California Baby Shower.


Yarn: Caron Simply Soft
in Orchid and Grey Heather
Hook: 4.25mm

Base Hat Pattern: Granny Stitch Sun Hat by My Merry Messy Life
The pattern is for a 3-6 month old baby so I adjusted the pattern down to fit a newborn.

Round 1: stop at 9 hdc instead of 11
Work the rest of the pattern as stated
Round 2: ends with 18 hdc total
Round 3: ends with 24 hdc total

Note: when I changed to the grey color on the Granny Square Stitch part, I actually turned and stitched the other way. It was the only way to get the stitched into the right spaces. :)

I ended up with a hat that measures:
Circumference: 11in
Height: 4in


The pattern states to fasten off and join for each color change but I didn't want to weave in all those ends so I carried the yarn along the back. I don't think it looks too bad so I'm sticking to it.

Because this hat came out so small and is for a newborn, I didn't want to do a big floppy brim.
Instead I crochet on this easy Shell Edging pattern.
Round 1: 1 sc into each st and ch around
Round 2: 1 sc *skip 2 sc, 7 dc into next sc, skip 2 sc, 1 sc into the next sc*
repeat around


The hat is cute but needs a little embellishment so I crochet this Teeny Tiny Flower and added a grey button in the center because the flower gets lost a little without it.


Finished and so cute!!! I need to make more boy baby hats now so stay tuned. :p

Update:
Sara from My Merry Messy Life honored me by asking me to link this post onto her Link Party, so I did. :) Please check it out. :) She has lots of very cute patterns. :)


She is so sweet...she also featured this post on her Sunday Fan Tribute Post! I hope you guys go check it out! :)

Saturday, August 4, 2012

Sending G Jr., the Jellyfish, to His New Home :)

I had made this Jellyfish Ami and was thinking about different cute ways I could send him to my friend, G. :) This is what I came up with. :)


First I went to Michael's Arts and Crafts to go buy me a take-out-box. I was looking for the frosted white one but they only had the solid white one or this clear one (I put the bag inside so you could see the box more clearly). They had a bunch of other cute colors but this is for a guy and I wanted the jellyfish to be the star. 

While walking around, I picked up these stickers and a panda notepad that was definitely not on my list. :p It was pretty affordable. The most expensive thing was the 3D stickers. The box and the panda notepad were just $1 each and I had a 20% off coupon. :)


Next, I took some blue tissue paper from my stash. This one is for winter with the snow flakes on it but because of what I did with it, it really didn't matter. :) I shredded the tissue paper and used it for "water" and for packing material by putting some around G Jr to make him comfortable.

G Jr is so darn cute!! in his little transport box!! But that's not the end...


I added an address label to the inside just in case something happened to the one on the outside. "From Amanda's Hands....To Geoffrey's Heart".

G Jr. looks so excited to be going on this trip to his new home. :)

I am including some snacks. My fav is Shrimp Chips but I haven't tasted them in a while because they are so bad. :) Looks like G Jr. couldn't wait to get his tentacles on them. I hope they last the trip. :)


I cut up a clear plastic bag to wrap around the outside to protect the 3D stickers. Then I taped up the opening and added my address label. The light blue part is for the postage.

Now, he's ready to go to his new home. :) If this works, I really want to try sending other items I craft through the mail, not in "proper" boxes. I've been reading posts of people sending Easter eggs and flip flops through the mail. I think that would be so much fun!!

UPDATE: Failed, the post office didn't allow me to send it as is. They made me put it into another box because they said that the wire would get caught in the machinery and that the box can easily come apart. ugh! Well, that did not work. I guess if I had wrapped the whole thing up in shrink wrap, they might have let me. Well, lesson learned.

Have a creative weekend! :)

Sunday, July 29, 2012

Jellyfish Amigurumi

One of my friends tried to raise jellyfish but failed twice. So, I decided to make him one that wouldn't be fragile and would love him forever. :)


This was my inspiration. All About Ami posted about making a jellyfish. Luckily, my friend, Rachel, bought me the book that the pattern was in as a gift, Amigurumi Toy Box by Ana Paula Rimoli. :) As usual though, I couldn't stick to the original pattern and had to change it up a little. :)


Here is my little jellyfish friend, G Jr. :)


I plan on packing him in a white frosted plastic take out box with some water and sea monkeys to munch on during his trip. :) Update: Want to see how I actually packaged him up? Check this post out. :)


I hope my friend, G, likes his new pet. :)


Materials:
Caron Simply Soft Yarn in Soft Blue
Crochet Hook size 3.75mm
12mm size safety eyes
Black embroidery floss
Nylon line for the hanger

My changes to the original pattern:
I deleted rows 16-18 in his body to make him less like a cone.
I also made his wave skirt a little more bubbly. :)

Friday, March 23, 2012

Another Steampunk Octopus Amigurumi

Yes, sorry, here is another Steampunk Octopus that I am making for Rachel's MobiCon booth. Did you like the updates on my WIP sidebar? :)

I usually don't re-make the exact same thing because I would just get too bored. There are 4 differences between this one and this one. :) 1. I added a crochet hat instead of a felt one. 2. I added a grey mustache for a more distinguished look instead of the mouth. 3. I used a darker blue yarn. I love blues. And 4. I added a more versatile hanger (you will see it at the end of the post). :)


I used this free pattern for the top hat. It was quite easy to make. I love the shaping. I think the rim could be one more row larger. :)


He accompanied me to grab In & Out for dinner. For those who don't live in California, it is a great burger joint that people over here love! :) They have a secret menu and everything. hehe


He's helping me decide what to order. Not really, I only get one thing every time I go. hehe


They give you these paper mats so that the box that your food comes in doesn't get your car dirty. They will ask if you want to eat it in your car or at home. If you say "eat in the car" then they will put it in an open box. Yum, hot fries!


He's helping me drink up the rest of my soda. :)

Now, for the new hanger system


I added a small split ring to the top of the hat before I sewed the hat to the head and before I stuffed the head too. So the string that connects the ring goes through it all and will last hopefully. I just added some glue to help.


I put a lobster claw finding onto a cell phone fob hanger. Sometimes they come like this. This allows the owner to take the hanger off and put it on their key chain, cell phone, or purse and then clip on the Octopus.


I hope someone will take him home in May. :) Good luck little one. :)
And I hope you all have a lovely weekend full of crafting! :)

Update 9-4-12:
My friend's sister named him Sir Sassafras. :) And he has been sold!
He is moving in with Megan in Washington State. :) I hope he remembers to be a gentleman. :)
My friend is super excited and posted about it here. :)
Great weekend, esp. since it was my bday weekend. :)

Tuesday, February 28, 2012

Onigiri Amigurumi

I wanted to make an amigurumi to adorn my friend, Rachel's booth at MobiCon in May this year. I racked my brain for a cute idea. A dragon? Some hearts or a bunny? No, too big, too small, and the last would be found hidden in my friend's purse. hehe Then I found a free onigiri amigurumi pattern and it was perfect! :)


What a cutie! :) If I make another one, I am going to put a big bow at the top of her head and some lace on the nori (seaweed) part and make her one of those cute Japanese hime gyaru (princess) girls. :p

Panda's Tips of the Day:

1. I used wrapping paper for the background to the picture above. It's inexpensive, cute, and you always have some wrapping paper around. :)

2. In order to place the nori, I wanted to temporarily hold it in place while I stitched around it but didn't have a big enough safety pin. So, I took a long piece of contrast color yarn cut when I finished another cutie and used it to tack the nori piece in place. It worked out really well.


3. I used a mini/short flat bobby pin as a stitch marker. I had bent a small paper clip using this tutorial but the ends would hook and catch on yarn. The mini bobby pin's ends were protected and round and the bobby pin was easier to thread through the small stitches than the paper clip. To each their own. :)


Update:
Someone else had the same idea to use bobby pins. :) Here is a great post on the use of bobby pins to help you while you crochet from Leisure Arts.

I hope you guys find something to -fever over. :)