Showing posts with label Ornaments. Show all posts

Monday, October 21, 2013

10 days till Halloween - Free Crochet Ghost Patterns!

OMG! Only 10 days till Halloween!!! And I've only made one thing to decorate with. :p I haven't been really in the Halloween mood but with some really cute crochet patterns out there and my wonderful friend, Bunny, from thewanderingbunny.blogspot.com sending me a great fun Halloween/Fall package, I'm getting in the holiday mood. :)


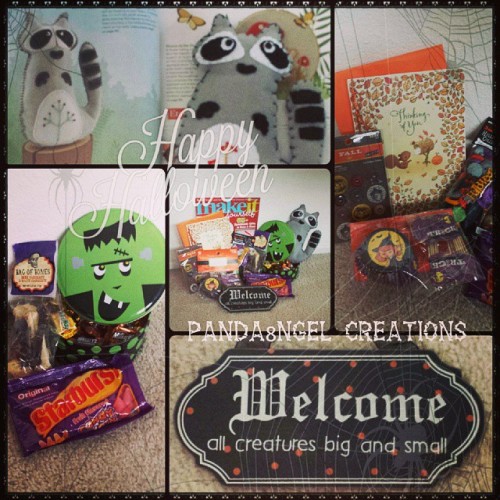
I love how she made this really cute felt raccoon feltie and then sent me the magazine with the pattern in it. :) hehe She also sent me some great Halloween decorations and treats. Makes me feel like digging up my Halloween decorations and go to town. :)


Since I'm just getting into crocheting Halloween themed cuties, I thought I would help you guys with some cute free patterns as well. :) Tonight, it will be cute friendly ghosts. :)


Let me introduce Andy, a little ghost who wanted to be a panda so bad that he decided to add panda markings for Halloween. With his limited resources, he wasn't able to completely become a panda but he is still quite adorable. :)

I made this cutie from the Free Baby Ghost Ornament Pattern from A Morning Cup of Jo Creations. You can find it HERE through craftsy. I would also follow her on the Facebook Page for more great patterns and giveaways. :)

The sweet guy is from Lion Brand and his name is Genie. I made him last year for my friend Rachel, my best Bunny, and added a sparkily red scarf for him. Sadly, I don't have a picture to post but you can find him on her blog (url is earlier in the post). For this free pattern, click HERE.


I found this larger crochet ghost over at craftsy. Just click HERE, it's free. :)


Click HERE for this adorable ghost decoration for Halloween. IDEA! :) You could also do a "Hear no Evil, See no Evil, Speak no Evil" ghost set with this pattern. :)


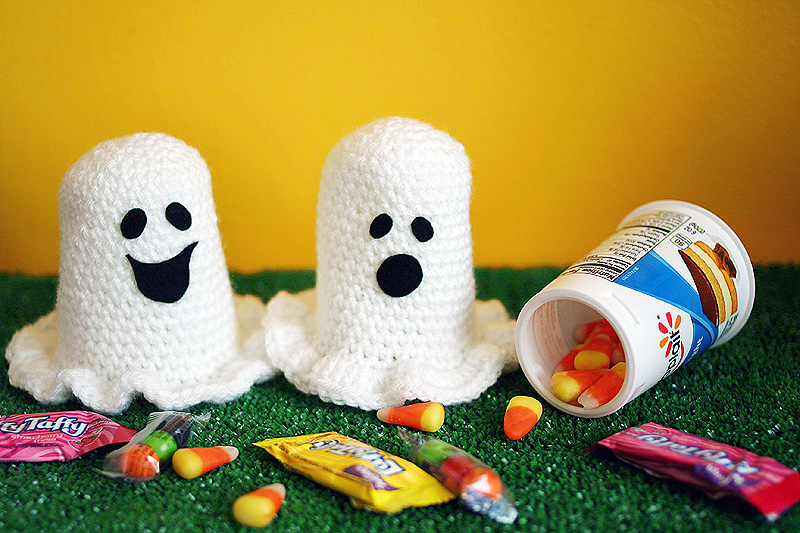
One of my favorite crochet designers, Twinkie Chan, came up with this Ghost Candy Container using Yoplait yogurt containers. Her adorable free pattern can be found on her blog, HERE. I would check out her other patterns, they are all adorable and usually centered around food. hehe


Can you believe it? I was so excited that someone wrote out a pattern for Zero the Ghost Dog and it's free!! You can find the pattern HERE.

And lastly, here is a great ghost bowl for all your treats. :) Boo!tiful Candy Bowl Free pattern from Lion Brand Yarn, HERE. :)

I would love to see all of your cute creations! Please post pictures on my Facebook Page, Panda8ngel Creations. :)

Monday, January 2, 2012

Xmas Decorations

I have been meaning to post this but haven't gotten around to it till now...
This year's holidays has been especially busy for everyone I know. I hope yours went smoothly. :)


My mom found an angel friend for my angel from my friend, Rachel. My mom also loves poinsettias during Xmas so I got her the one in the Santa box (glittery and cute from the grocery store) and she had to get him a friend from Home Depot. Getting them around Xmas is not a good idea since they are usually wilted and very much sad looking. Next year, as always, we need to get them early.  


My mom also go this beautiful pink plant and the red version below on the same trip. The pink one is so cute with the "Joy" sign and her snow man ornaments. We like to put ornaments on door handles and on table tops rather than on the actual tree...hehe


Sorry for the terrible photo but I did put this cross stitch ornament made by the Wandering Bunny for me last year on the tree. Last year, I had it hanging off the door handle of my room. :)


I couldn't find the tree topper I used last year so I made a ribbon flower and used that instead.


Out table top white feather pre-lit tree. I really like the style and look of it. Next year, I am going to decorate it in red so have a red and white theme. If I can find some cute/pretty red origami paper, I will make origami ornaments. :) I put all the cards we received on the bottom of the tree.


The Wandering Bunny also made and sent me these nice Cross stitch pieces. They look really nice with the red plant and some ornaments in vases. :) 


This year, Rachel sent me this beautiful hand painted ornament for Xmas. :) It looks really nice hanging from the chandelier. I will have to find an ornament display to put it on for next year.


Thank you Bunny for providing me with most of my Xmas decorations!! :)

Thursday, November 17, 2011

Easy Childhood Paper Ornament

I was wrapping a gift for my friend's Birthday and it necessitated the need to make this paper ornament that I used to do a lot when I was little. It is easy so I thought I would teach you guys. :) I am sure Rachel remembers this one well. :)


I like to get boxes from Macy's for all my gifts but I needed to hide the logo because the present inside was not actually from Macy's. Then I remembered this easy paper ornament I used to make when I was a kid and it was a perfect fit! I thought I would share how to make it. For Christmas, all you have to do is change the color scheme to alternating red and green for a cute wreath or blue and white for a nice star. But, I am getting ahead of myself. Here is how to make it.

Step 1
Cut out 8 squares that are 3 inches by 3 inches from any paper. I used wrapping paper here to match the outside wrapping paper. I would not use card stock though because it can be a little hard to fold.

Step 2
Fold in half with colored side out.

Step 3
Unfold and you will have a line down the center of your square.

Step 4
Fold it diagonally with the colored side out.

Step 5
Unfold.

Step 6
Fold on the diagonal the other way with colored side out.

Step 7
Unfold. You will see an "X" and a line in the middle.

Step 8
Fold along the half way line again but this time with white side out. You can skip this step but it helps me make the next folds easier.

Step 9
Fold up one corner to the center, AKA Fold down the top edge to the center line (the crease), to make triangles. 

Step 10 View 1
Fold the other side the same way.

Step 10 View 2
When you open the square up, it should look like this, a little house.

Step 11 View 1
Now when the fold the square along the same edge down the middle, it will automatically fold and look like this. The tip is from the folds on step 10. The two "legs" are because of the diagonal and horizontal folds made.

Step 11 View 2
Here is the view from the bottom. I am holding the tip and the "legs" are at the top of the picture.

Step 11 View 3
Step 12 View 1

Fold it down and you should get this. This is the bottom of the unit.

Step 12 View 2
This is one unit. This is the top of the unit. Now repeat that 7 more times for a total of 8 units.

Step 13 View 1
Now you are going to assemble. I have started it here already. I have assembled 6 units already. I am going too call the unit which is mostly green, Unit A and the stripped unit that I am adding in, Unit B. You are going to slide Unit B into the crevice made by the "legs" of Unit A. Make sure all the top sides are facing out.

Step 13 View 2
Here I am holding it up. Make sure the bottom of Unit B is lying flat against the bottom of the "legs" of Unit A in order for it to fit.

Step 14 View 1
Fold the tips of the "legs" of Unit A over the top edge of the "legs" of Unit B. This will old the units together. 

Step 14 View 2
Need to fold over both tips.

Step 14 View 3
Pull Tight

Pull Unit B so that the folded tips of Unit A are snug.

Adding the last unit. View 1
You will have to fold the tips between the top edge of the "legs" of the outer unit and the tip of the inner unit.

Adding the last unit. View 2
And you are done. I made sure to take pics of each little step and it really makes this tutorial look and sound harder than it is but I didn't want anyone lost. Once you actually make it, you will see how easy it is. :)

It's a Wreath
But wait....
Slowly slide the units inwards. It will slide opposing units at the same time.


I kind of like this look. I might stop here next time and use it as a tag on something.

It's a Star!


It covers the logo on the box really well and adds another element to the gift. :)

Finished wrapped gift
I hope you guys will try this. It was fun going back to my childhood. And using gift wrap made this embellishment really cute.